
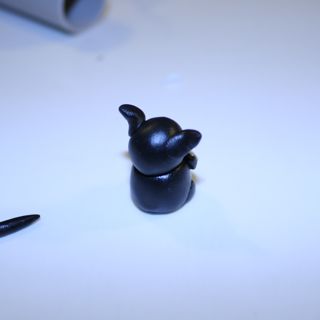
This is a tutorial aimed at beginners to make this little guy. Here's what you need:

- Polymer clay (goes without saying really) in black, white and pink. I don't have pink so I'm using red and white. I'm using Sculpey Premo brand, but there are quite a few brands to choose from.
- A clay cutter.
- Some sort of non-stick mat. I'm using a laminated place mat.
- A rolling device. I have an acrylic tube but I've seen this done with a can of hairspray. Anything non-porous is fine.
Through trial and error I've realised the best thing is to start by making the white shapes you need, otherwise you'll end up transferring colour from other clay to the white. You need to roll the clay around in your hands to make sure it's all soft and the same consistency throughout. You can roll it out too if you prefer with your rolling pin-type-thing, just to make sure it's all warm and well mixed. The white picks up fluff really easily, I used a sharp point to pick out the obvious bits.


First you're making what will be his white stomach. You just take a little ball of white clay and roll it around in your fingers, then press firmly onto the table to flatten it out into roughly an oval shape. If it's the wrong size just roll it up and try again.
Then you need to make what will be the paws and eyes. To make each eye or paw the same size, make one ball of clay and split it down the middle. You can leave them as balls for now, their eventual shape will be more obvious later on.
For his individual 'claw' bits, make a really (really) thin roll of clay and cut thin cylinders off it. Put all these bits to one side for later.


Next you're making the body and head. Roll out some black clay til it's soft, and then make two balls, one a bit larger than the other.


Then you need to make the paws and ears. Again separate out and roll two little balls of black clay, then split each in half (so you get ears and paws of the same size). For the ears, roll each half a ball into a cylinder, and squeeze one end between your finger and thumb so you get a teardrop shape (left pic below). For the paws, press the ball mostly flat on the table (right pic below), then shape it into a sort of, soft semi-circle.


For the tail, just roll another cylinder of clay that tapers off at one end.

Now time for phase two! Assembling. Phew.


Put the head onto the body, and then put the flat white oval from the first bit of the tutorial onto the kitten's middle. Then you put the semi-circle black paws on, and the flattened small balls of white that you made at the start. You then dot on the tiny bits of white as little 'finger' claws.
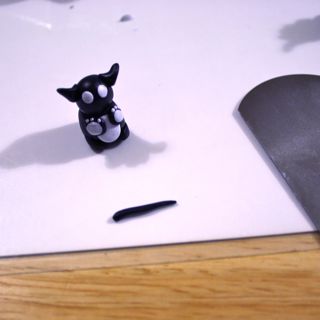
Next you put his ears on. Squish a little flat bit at the wide end of the ear, and press it to the side of the kitten's head. This will be strong enough once baked to hold his ears on. The tail just goes on up his back. Again squish a little flat bit and stick that underneath, then 'wiggle' his tail up his back. Make sure even the tip of his tail touches his head or body, otherwise it could snap off during baking. You then put the white eyes on (flatten out the balls you made earlier), and cut two tiny bits of black for his pupils.

Now all that's left is a nose! If you have pink clay, just add a little dot of that. I didn't, so very quickly here's an easy clay blending method. A tutorial within a tutorial, if you will.
Clay blending to make one constant colour, dead easy!


Take a small amount of red, and a lump of white. Press the red into the white and roll it out. Fold it up and roll it out again repeatedly until all of the clay is the same colour throughout. You can save the rest of this pink in cling film, so don't worry about making lots more than you need for a nose!

Once you've put his nose on, that's it! :) At this stage you can add a loop if you want him to be a keyring or pendant. You can use a metal 'eye' with a screw, but personally I'd use an eye pin as it will be much thinner and won't displace the clay as much. Just cut off an eye pin (leave around 5mm straight pin) and push it into his head (ouch!) before baking.
You just need to bake your little fella and he's finished. For Premo Sculpey, I bake (on baking paper as well as a tray...don't want him to stick) for 30 mins at 130 degrees, but it will say on the pack of clay what time and temperature to use. When he's done and cooled, you can glaze him (using polymer clay gloss or varnish), or leave as is. If you want to paint on whiskers, you can use acrylic paint after he's been baked (before the gloss).
So that's it, my first tutorial. I'd be really interested to hear your feedback and see what you make! :) He'll be available in my Etsy shop soon.
No comments:
Post a Comment